Simple Camera Trigger - v2
Introduction
In the previous version, we had a functional prototype to control the camera through IR and an Arduino for controlling the time of the trigger.
Elements of the fast prototype
- Original coin cell separated of the main power (I didn’t know if the current from the Arduino could be enough).
- An Arduino UNO (Which we could change for an Arduino Pro Mini, for lower current consummation proposes)
- The Arduino connected to the PC (We want to have an standalone application, with a battery)
- A simple BJT to control the power supply. The BJT could, theoretically, works as an electronic switch, but for real, sometimes there is some current passing through Collector-Emitter, so, the BJT could trigger accidentally when we don’t want. Solution: Use a specific MOSFET for this kind of situation.
Projects improvements
- A single battery which could be able to power both Arduino and the remote control.
- The battery could be a Lipo with 1 cell, which means, 3.7V.
- For the Arduino Pro Mini, we could use the raw voltage input, which it is able to admit between 3.3 and 12V.
- The remote control needs 3V
- Even if is not much, we could regulate the voltage with something.
- We could add Buttons to select the timing/period of the trigger
- We could use a display (7 segments, 4 x 7 segments, LCD) to show the information of the timing programmed, or we could use even leds to indicate the status of the timing (Depends of current consummation calculation).
- A great tool to draw the schematics in high level
Arduino Pro Mini

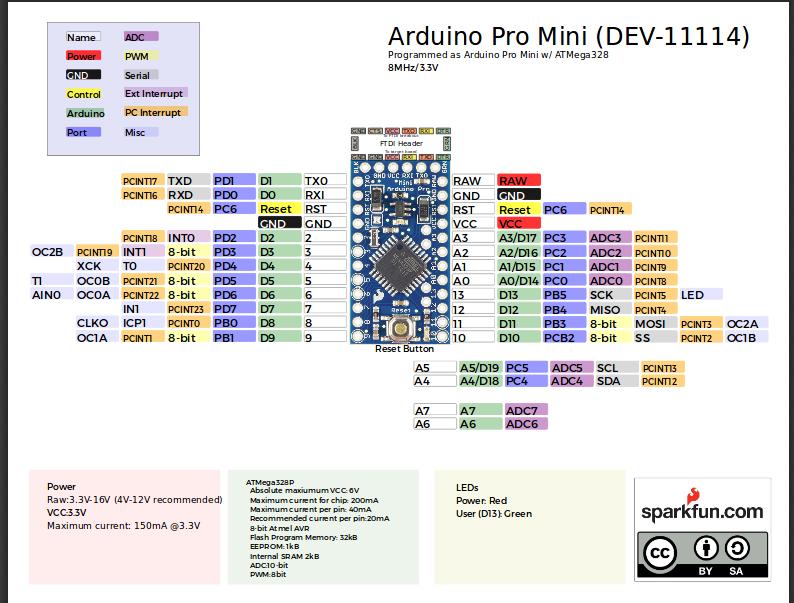
Download pdf datasheet from here
Powering
Battery
I have two kind of batteries,
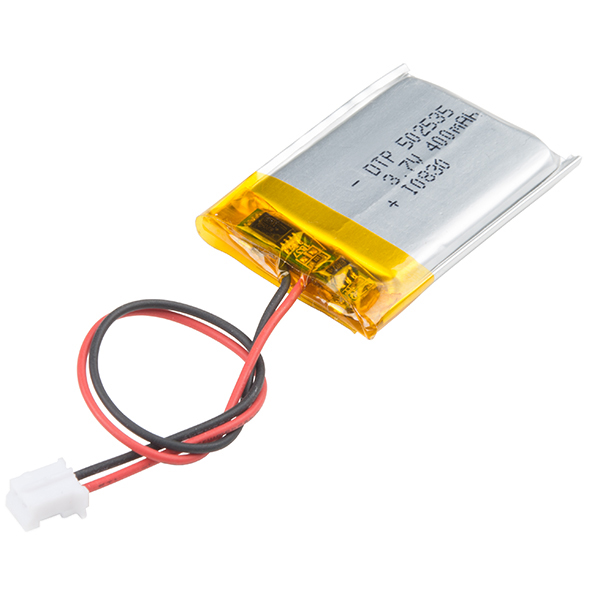
or
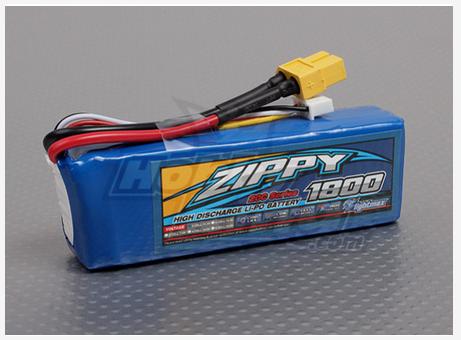
Normally, the lipo batteries are for RC planes, car, etc. This is why, we have high current and big capacity. A small calculator of our needs here
Voltage regulator 3V
In the past, I’ve used voltage regulator to convert to 5V, or even more stable regulators from pololu here and here but in this case, we need something more specific, and even less than the typical 3.3V. We introduce the LM317 or the LD1117 to convert to 3.0V.
I’ve bought this regulator because it is possible also to regulate the current with them, but in this case, it is a great opportunity to use as voltage regulator.
I’ve found this schema,
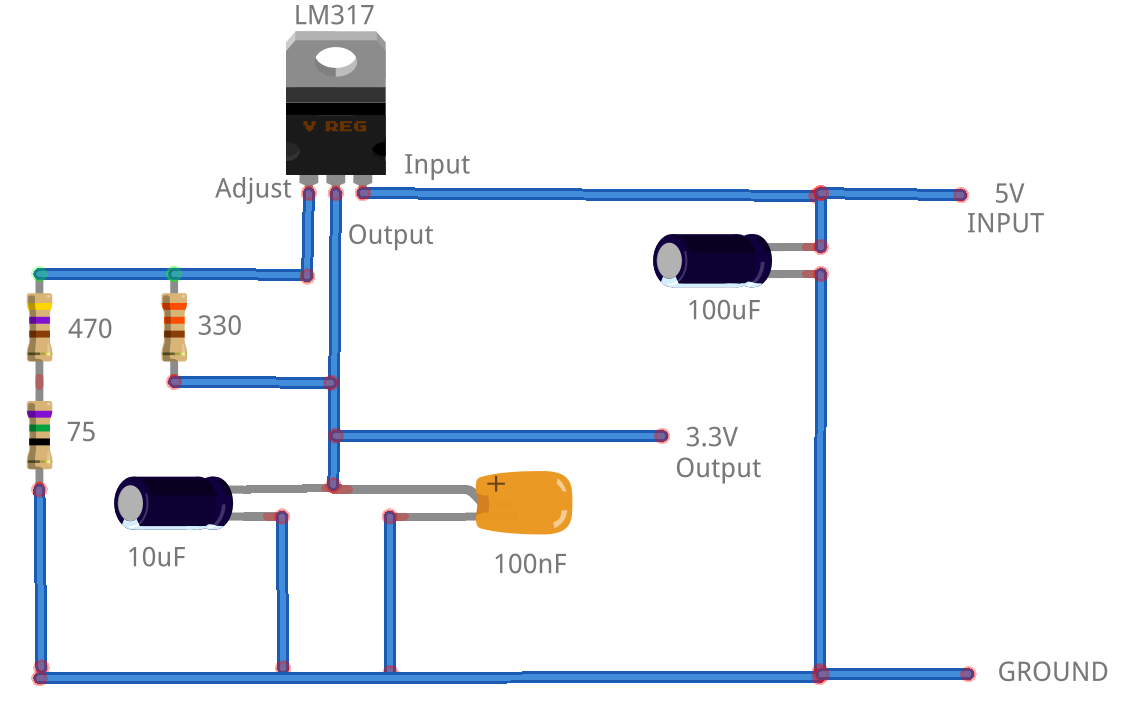
which it’s nice, because we have the capacitor to improve the stability of the current, and we have even this calculator to calculate the resistor for our desired output voltage.
Low Powering
Talking about low powering, here we have some tips to reduce the current consummation here and here
Remote Control switch
I’m going to use the same mosfet I’ve use to control 12/24V from Arduino. But, in this case, it is not critical because we are going to control the 3.7V from the Lipo.
And, in this case, instead of control a motor, it will be the remote control.
HMI (Human Machine Interface)
Button

Display


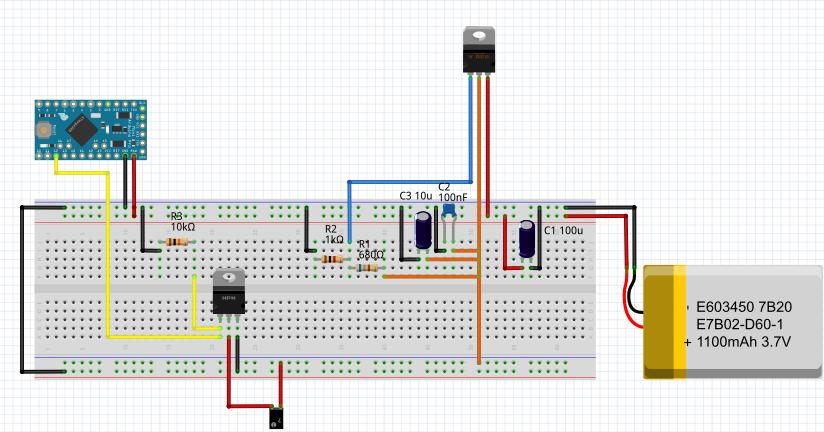
Electrical Schema
Problems
I have had several problems with the remote control that I’ve used to control the camera.
It doesn’t matter if the remote control and the arduino are powered separately (coin cell and battery lipo) or everything together with the same lipo, the problem is the same:
The remote control seems don’t work with the Mosfet. But, the power (3V) or directly the 3.7V reach the remote control.. But nothing happens in the shutter. If I’ve change the Mosfet by a regular BJT is working.
What I understand about the Mosfet, they are a kind of transistor, and connected as I’ve connected, they should allow the current, so, the 3V/3.7V through the remote control, or not, depends of the Gate status, controlled by Arduino.
But something seems not working correctly… The IR doesn’t light when the remote control has 3V thought the Mosfet, but it’s working if I connect it directly to the coin cell. So, something is wrong in my schema, that doesn’t allow enough current.
And I am tired of using this remote control. So, I bought IR Leds, and I am going to play with the IR Remote library for Arduino. In this way, I don’t have to use the remote control anymore, and the circuit is simplified a lot. Also, the consumption is going to be less.