Smart Scanner
Introduction
The goal of this project is to make “smart” an old scanner. We will have a button to automatically scan what ever you want and send this information to a shared disk, to be accessible from another computer (or in best cases, from mobile phone).
Build of materials
- Raspberry Pi Model A (The first rpi model, although, it doesn’t matter which rpi you will use)
- Scanner (I’ve used an old HP Deskjet, printer-scanner. It could be any scanner compatible with SANA libraries. See below)
- Normal button
- Green led
- Red led
- 2 x Resistors 220ohm
Steps
1. Connect the scanner to the rpi
The first idea when I wanted to have the rpi as the brain of my scanner was use the rpi as a scanner server
I use a Linux PC with Ubuntu to connect with the rpi.
The first problem when I’ve connected the scanner and I tried to use the SANE libraries was the incompatibility of the scanner with the rpi. After
sudo scanimage -L
I had the error “No scanners were identified”
After install the HP libraries (Yes! It seems they have a team in charge of develop libraries open source for all OS and even an API), the SANE libraries work. Install the libraries just with
sudo apt-get install hplip hplip-gui
And try again to scan
sudo scanimage -L
See more SANE options for scan
After working in local, I follow the rest of the article, and using in the client the skanlite software, I was able to scan. Great!!
My surprise was when, from Mac and Windows, the scanning with SANE was a bit more complicated.
For Mac there are libraries called Twain-Sane but I couldn’t make it work
PS: Don’t forget to fix the rpi address to access from your computer thought ssh / scp, OR, configure your router, the DNS Server to have the same IP for your rpi.
2. Python script - Buttons and leds
After the unsuccessful configuration from a Mac, I change to another idea: Hey! I have a Rpi with lot of pins, fully configurable!
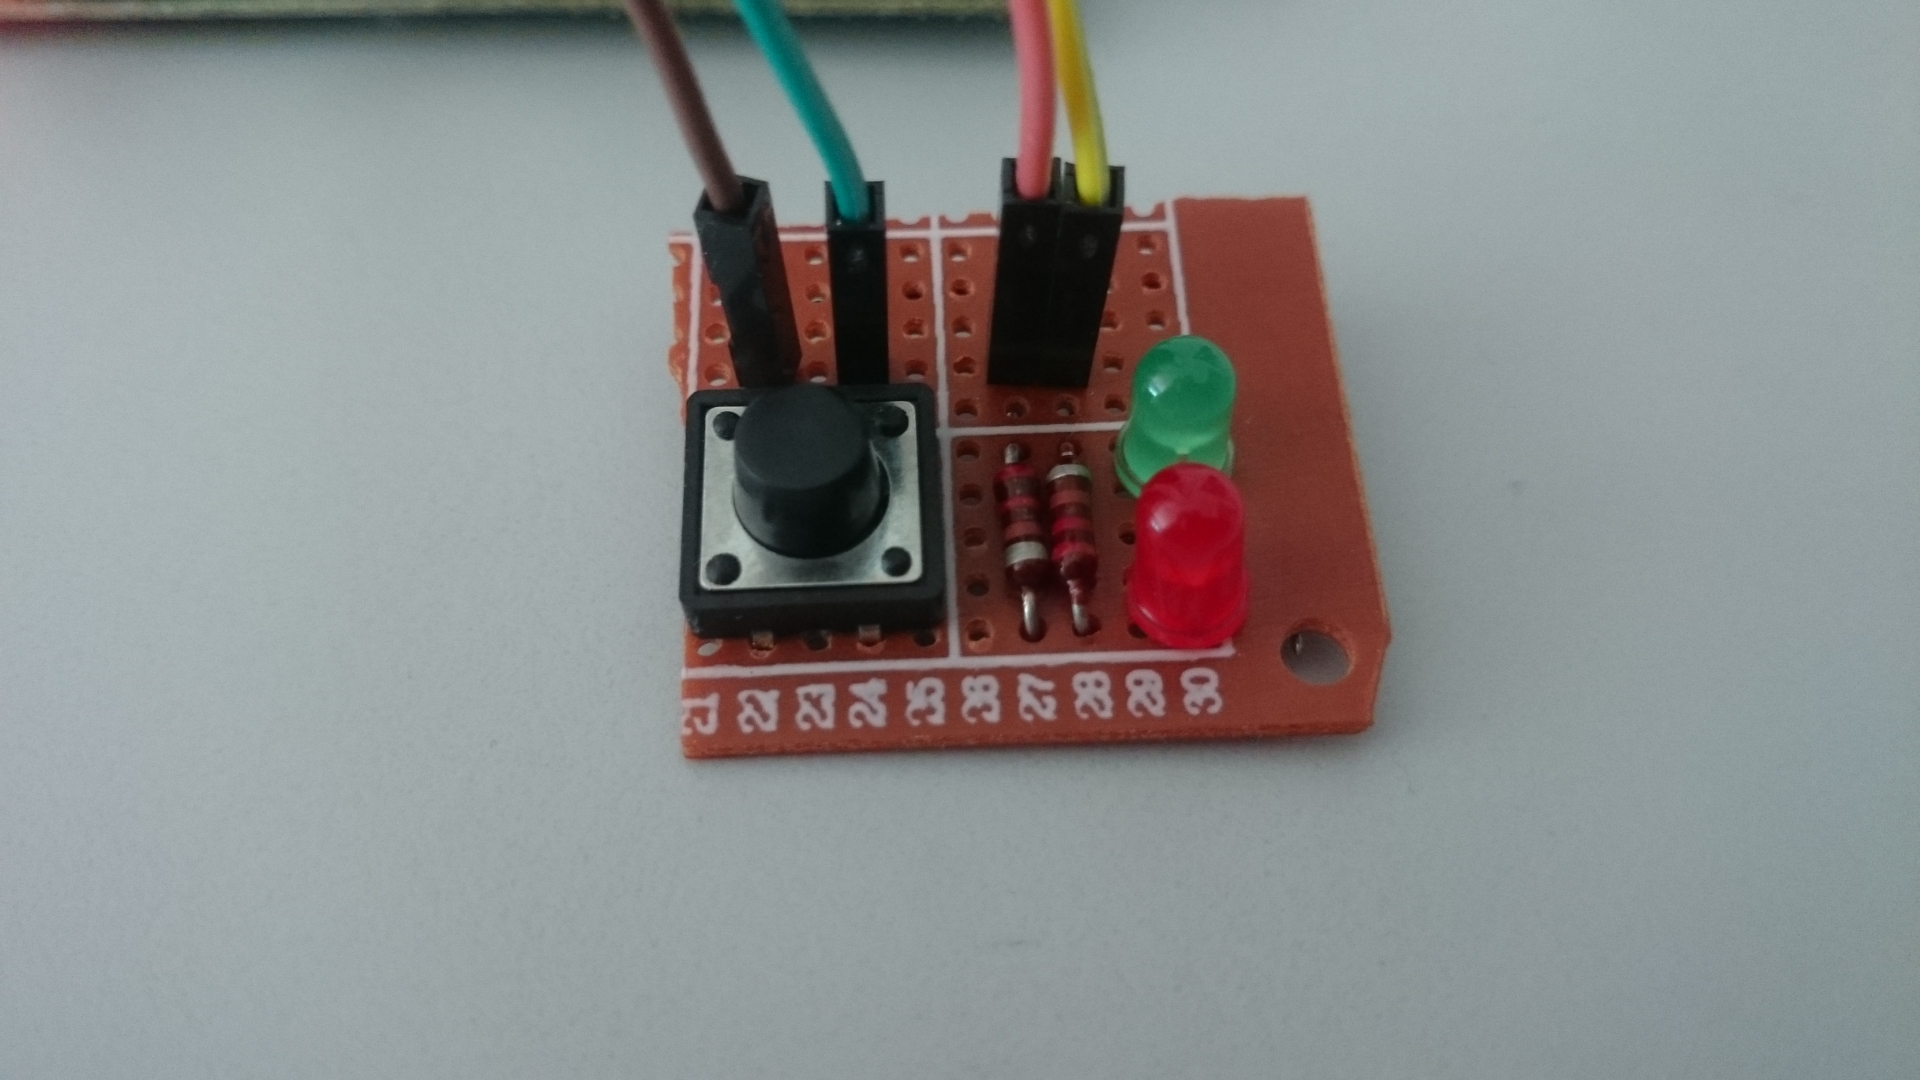
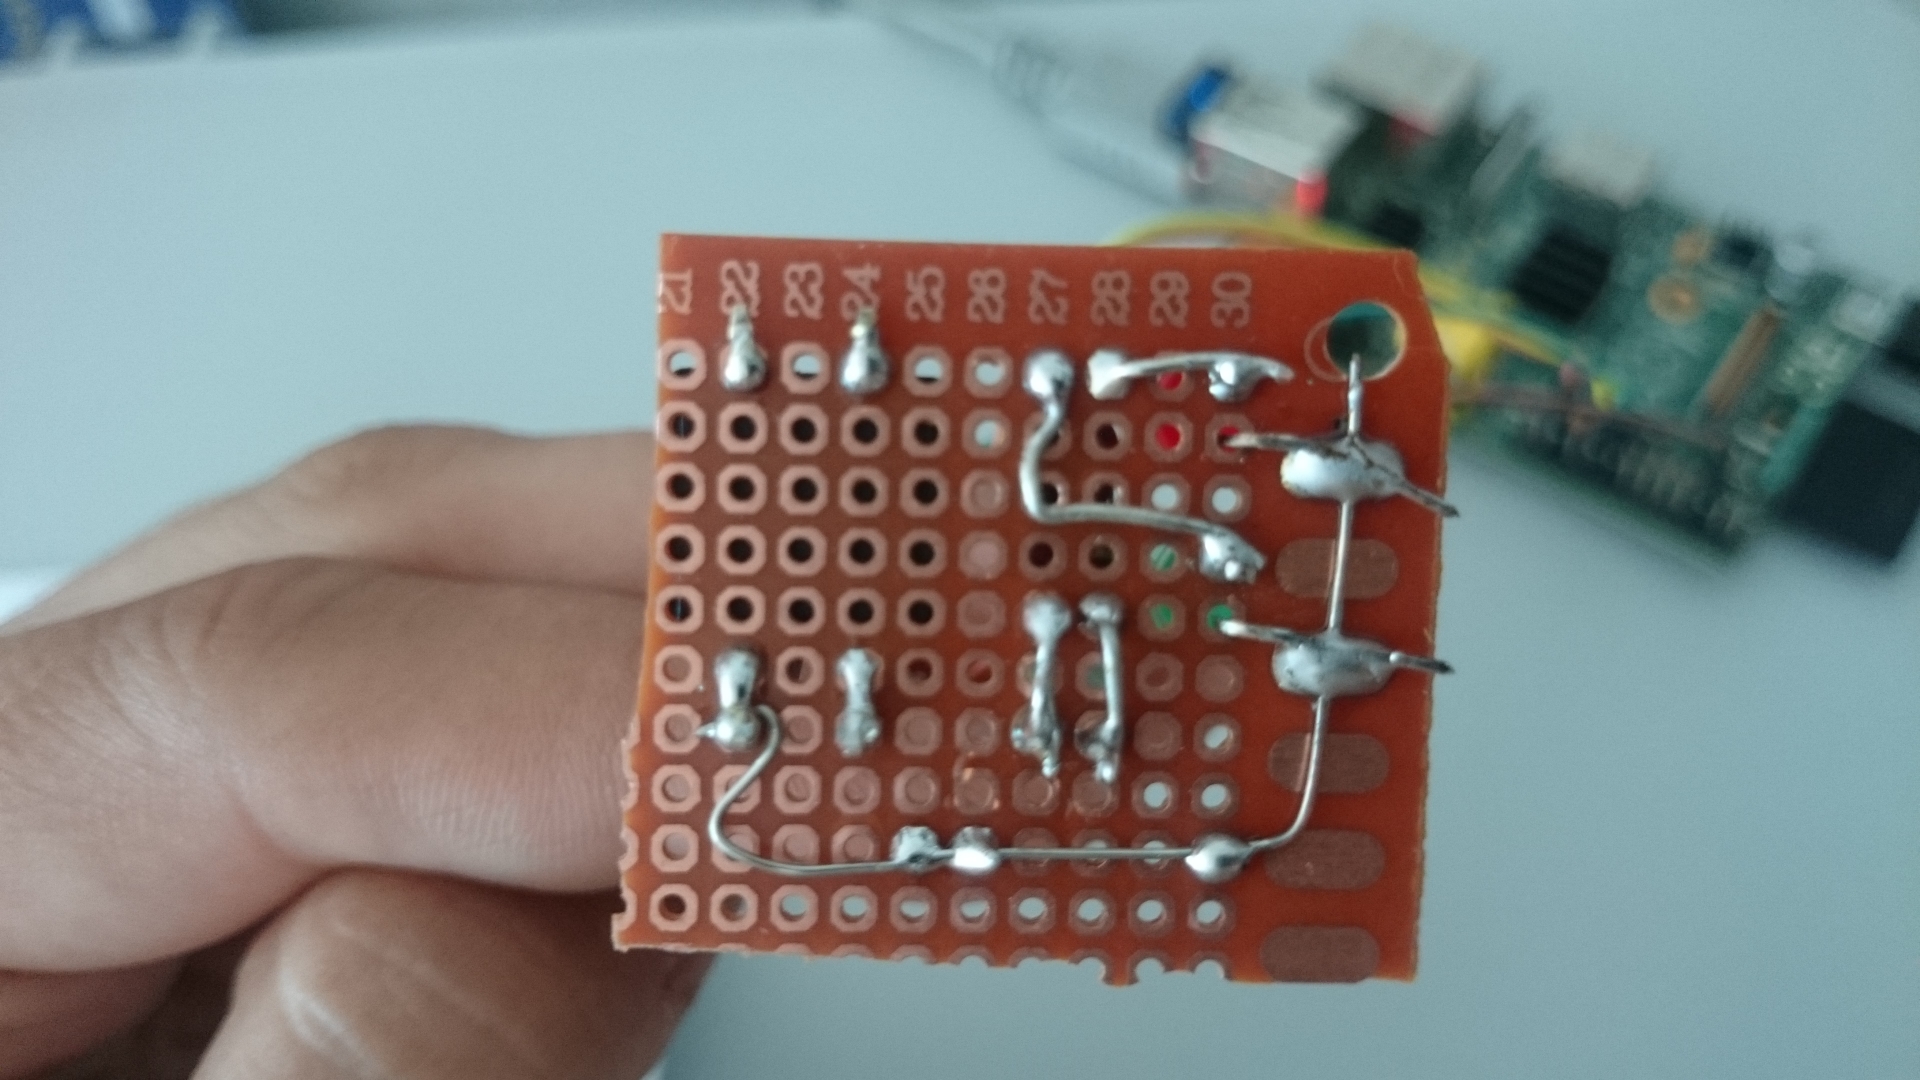
So, I’ve built a small pcb with a button and two leds; the button to start scanning, the green led for the starting and the successful operation, the red led for the errors.
I let you a small example for the button and leds, or this second example
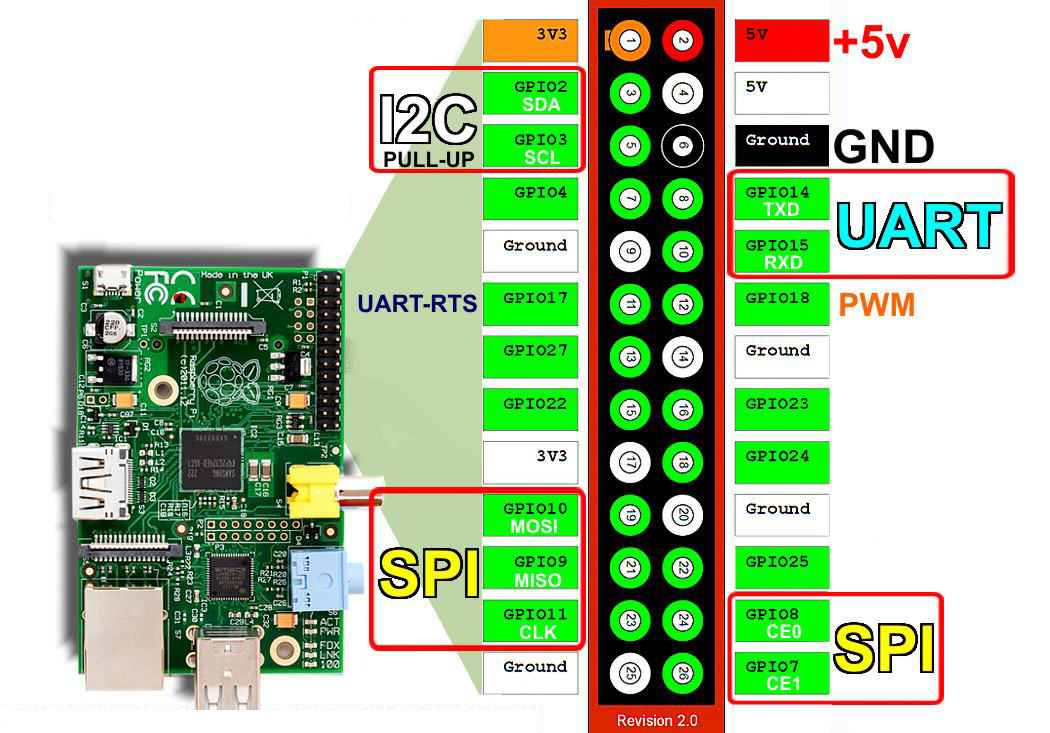
You should know the pin-out of your rpi. As I’ve used a rpi model 1, this is my pin-out
We can start with the example code from the page below, and then, add the other led and do what you want to do when you press a button
import RPi.GPIO as GPIO
import time

GPIO.setmode(GPIO.BCM)

GPIO.setup(23, GPIO.IN, pull_up_down=GPIO.PUD_UP)#Button to GPIO23
GPIO.setup(24, GPIO.OUT)  #LED to GPIO24

try:
while True:
     button_state = GPIO.input(23)
     if button_state == False:
         GPIO.output(24, True)
         print('Button Pressed...')
         time.sleep(0.2)
     else:
         GPIO.output(24, False)
except:
GPIO.cleanup()
This approximation is not ideal, due you have to run a script (while loop continuously!) in your rpi waiting for a button pressed. It could be better make this with an interruption, as this example
3. Button to scan
Now, if you tried the button and the rpi responds to your orders, we can progress. We call the SANE libraries for scanning a document when you press a button and save the document in some place, to recover it afterwards. Also, we will blink the leds several times, for better visualization.
To call the libraries, we can use simple the “call” function, in python -> Example
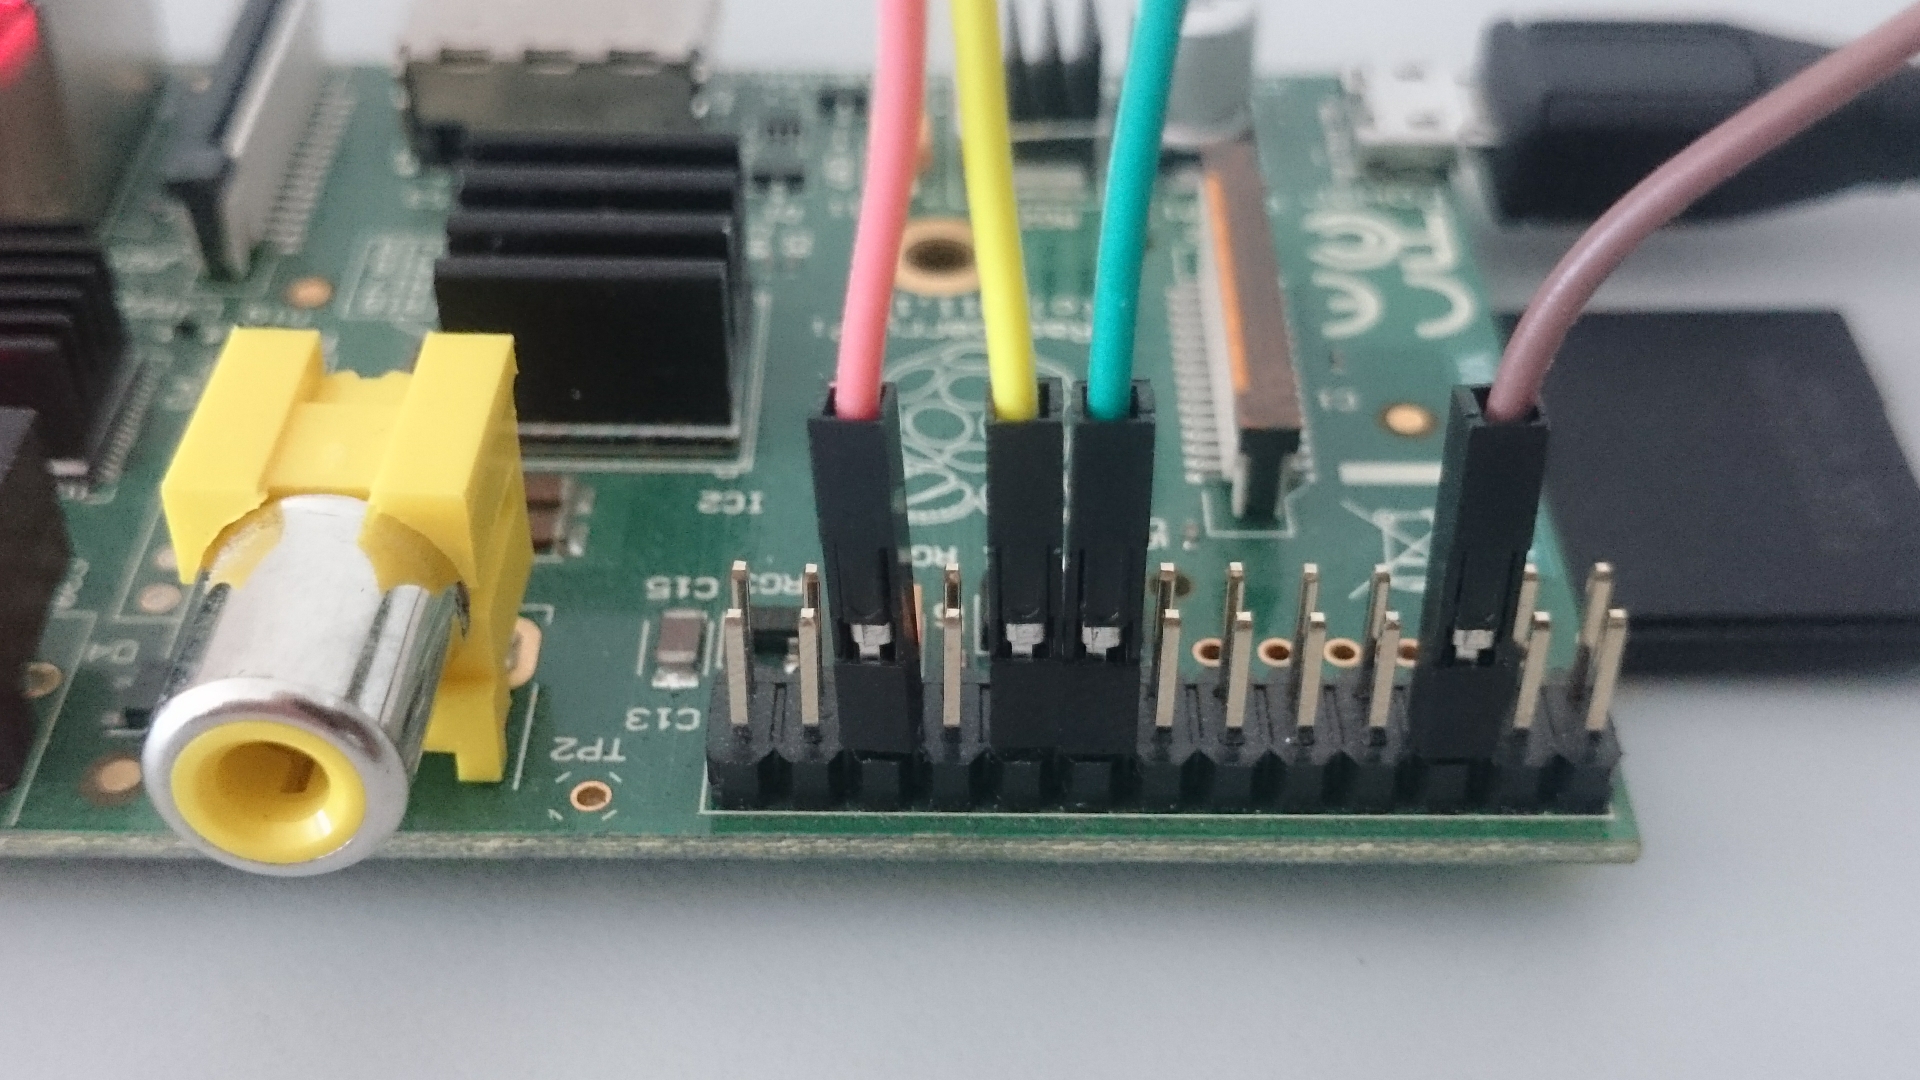
HW
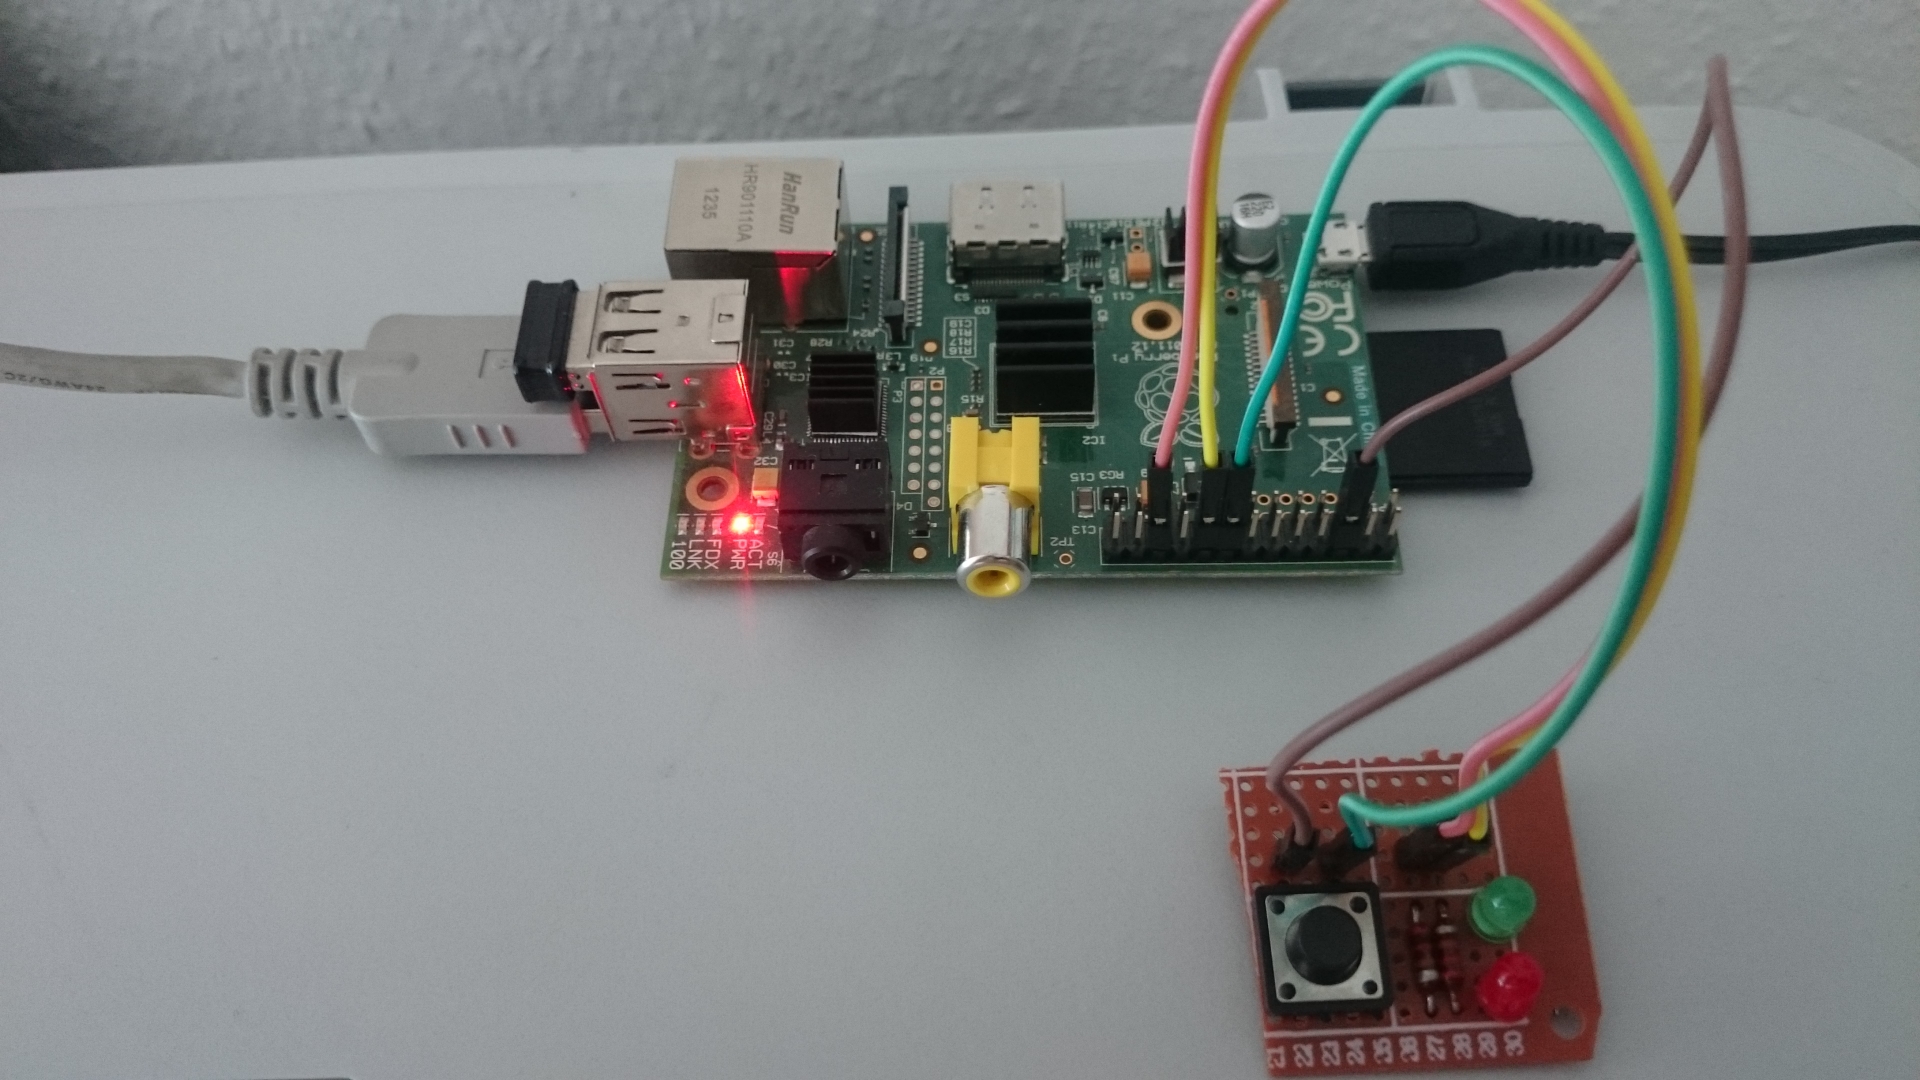
This is the final configuration for the button, 2 leds and the pin-out.
SW
#!/usr/bin/python
from datetime import datetime
import subprocess
import RPi.GPIO as GPIO
import time

# Definition
INTERRUPTOR = 23	#Button to GPIO23
LEDRED = 24 		#LED to GPIO24 red
LEDGREEN = 25		#LED to GPIO25 green

# Functions

def blinkled(dirled, timeblink):
	cont = 0
	while cont <= timeblink:
		cont = cont + 0.1
		GPIO.output(dirled, True)
		time.sleep(0.05)
		GPIO.output(dirled, False)
		time.sleep(0.05)


def main():
	# Setup HW
	GPIO.setmode(GPIO.BCM)
	GPIO.setup(INTERRUPTOR, GPIO.IN, pull_up_down=GPIO.PUD_UP)
	GPIO.setup(LEDRED, GPIO.OUT)
	GPIO.setup(LEDGREEN, GPIO.OUT)

	# Loop
	try:
		while True:
			time.sleep(0.1)
			button_state = GPIO.input(23)
			if button_state == False:
				now = str(datetime.now().isoformat())

				blinkled(LEDGREEN, 1)

				print('Button Pressed at ' + now)

				# Scan
				return_code = subprocess.call("scanimage --format=png >~/" + now + "_scan.png", shell=True)

				if return_code == 0:
					blinkled(LEDGREEN, 2)
				else:
					blinkled(LEDRED, 2)

				time.sleep(0.5)
			else:
				GPIO.output(LEDRED, False)
				GPIO.output(LEDGREEN, False)
	except:
		GPIO.cleanup()

if __name__ == "__main__":
    main()
Recover the document You can always recover the document from any Linux/MacOS computer with the command scp
scp pi@192.168.X.XXX:~/document.png ~/document.png
But, if you have a shared folder in your network, or a NAS, you can mount the NAS folder when you start the rpi, and save the document in this location. See this tutorial
4. Initialize the smart Scanner when power ON the rpi
The last step is to start this python script when you start the rpi. In this way, you will have everything configured and ready to scan, if you want to shutdown your rpi in some moment.
There are several ways to do it, but with the modification of the rc.local, it’s just working.
sudo vi /etc/rc.local
And add the path of your script.
sudo python /home/pi/button2scan.py &
To check if it’s working, reboot and press the button to scan.
sudo reboot
PS: If you have a rpi model 2 or 3, and want to shutdown the red leds of your rpi (letting the leds ON every night in a room could be disgusting…), you can do it, following this tutorial