Home Automation - Espressif ESP8266 and ESP32 (Part II)
Introduction
In this post, we explore the diverse capabilities and opportunities offered by Espressif’s renowned microcontrollers, the ESP8266 and ESP32.
Guides:
- Development boards comparison
- ESP8266 guide for the NodeMCU development board
- ESP32 guide
In order to program and use the boards, we could use different methods:
- Arduino IDE, as briefly mentioned in the previous post.
- ESPHome
- ESPHome Device Builder
- ESP-IDF (Espressif IoT Development Framework), we will explore this possibility in futures entries.
Personally, I have the two types of boards,
- ESP8266 with NodeMCU Amica amazon, pinout
- ESP32-WROOM-32 amazon, datasheet, ES32 Series datasheet, User guide Note: A newest ESP32 is recommended, ESP32-S3-DEVKITC-1
Arduino IDE
Using the Arduino IDE is the easiest way to program and use any ESP board, with plenty of examples for development
IDE,
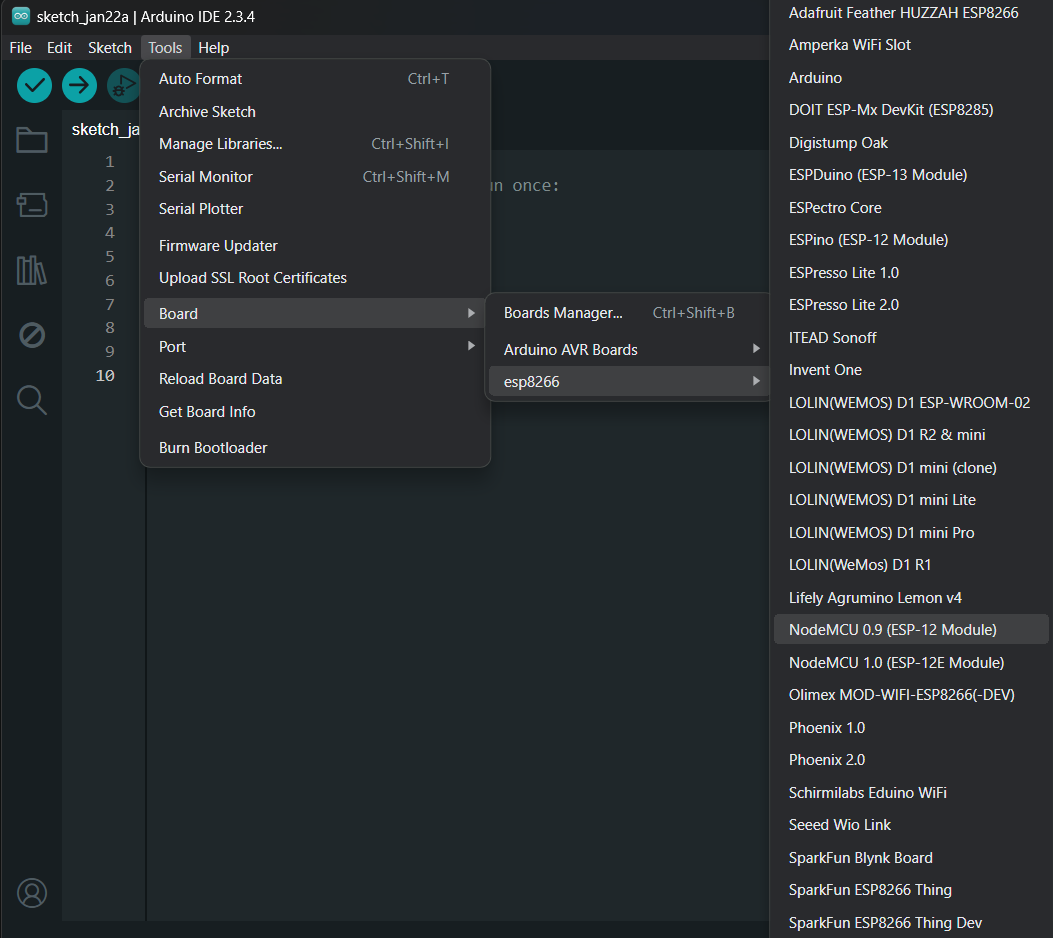
Examples,
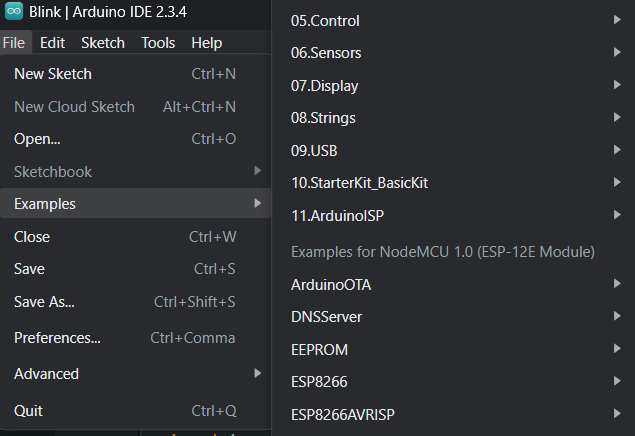
Blink code example,
void setup() {
  pinMode(LED_BUILTIN, OUTPUT);
}

// the loop function runs over and over again forever
void loop() {
  digitalWrite(LED_BUILTIN, LOW);
  delay(1000);
  digitalWrite(LED_BUILTIN, HIGH);
  delay(2000);
}
And if using the MQTT Client library, PubSubClient, we could use the ESP8266 with MQTT to communicate with Home Assistent, as previous post.
ESPHome
Using python to install the tool and following the official guide, it is very easy as well to just program anything on the board (ESP8266 or ESP32), reusing components to communicate with different sensors only by adding the description in the yaml file, and even programming Over-The-Air (OTA) the microcontroller.
Create a project,
esphome wizard livingroom.yaml
Adding some features,
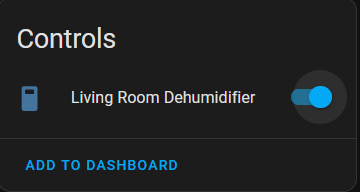
switch:
  - platform: gpio
    name: "Living Room Dehumidifier"
    pin: D0
Upload the code,
esphome run livingroom.yaml
On the Home Assistant side, the ESPHome is detected as new integration, and a new Device (in this case, called espi) could be found

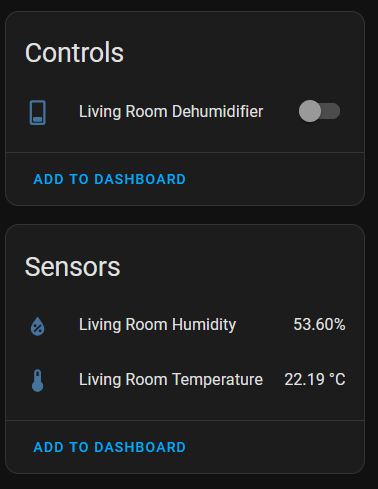
The feature of the ESP8266 is a simple switch, which will toggle the LED status, D0, between HIGH and LOW. This can now be controlled by the Home Assistant with the control entity
From here, all the components could be added following the same logic (More component description here).
And after this first programming, the next could be done by OTA.

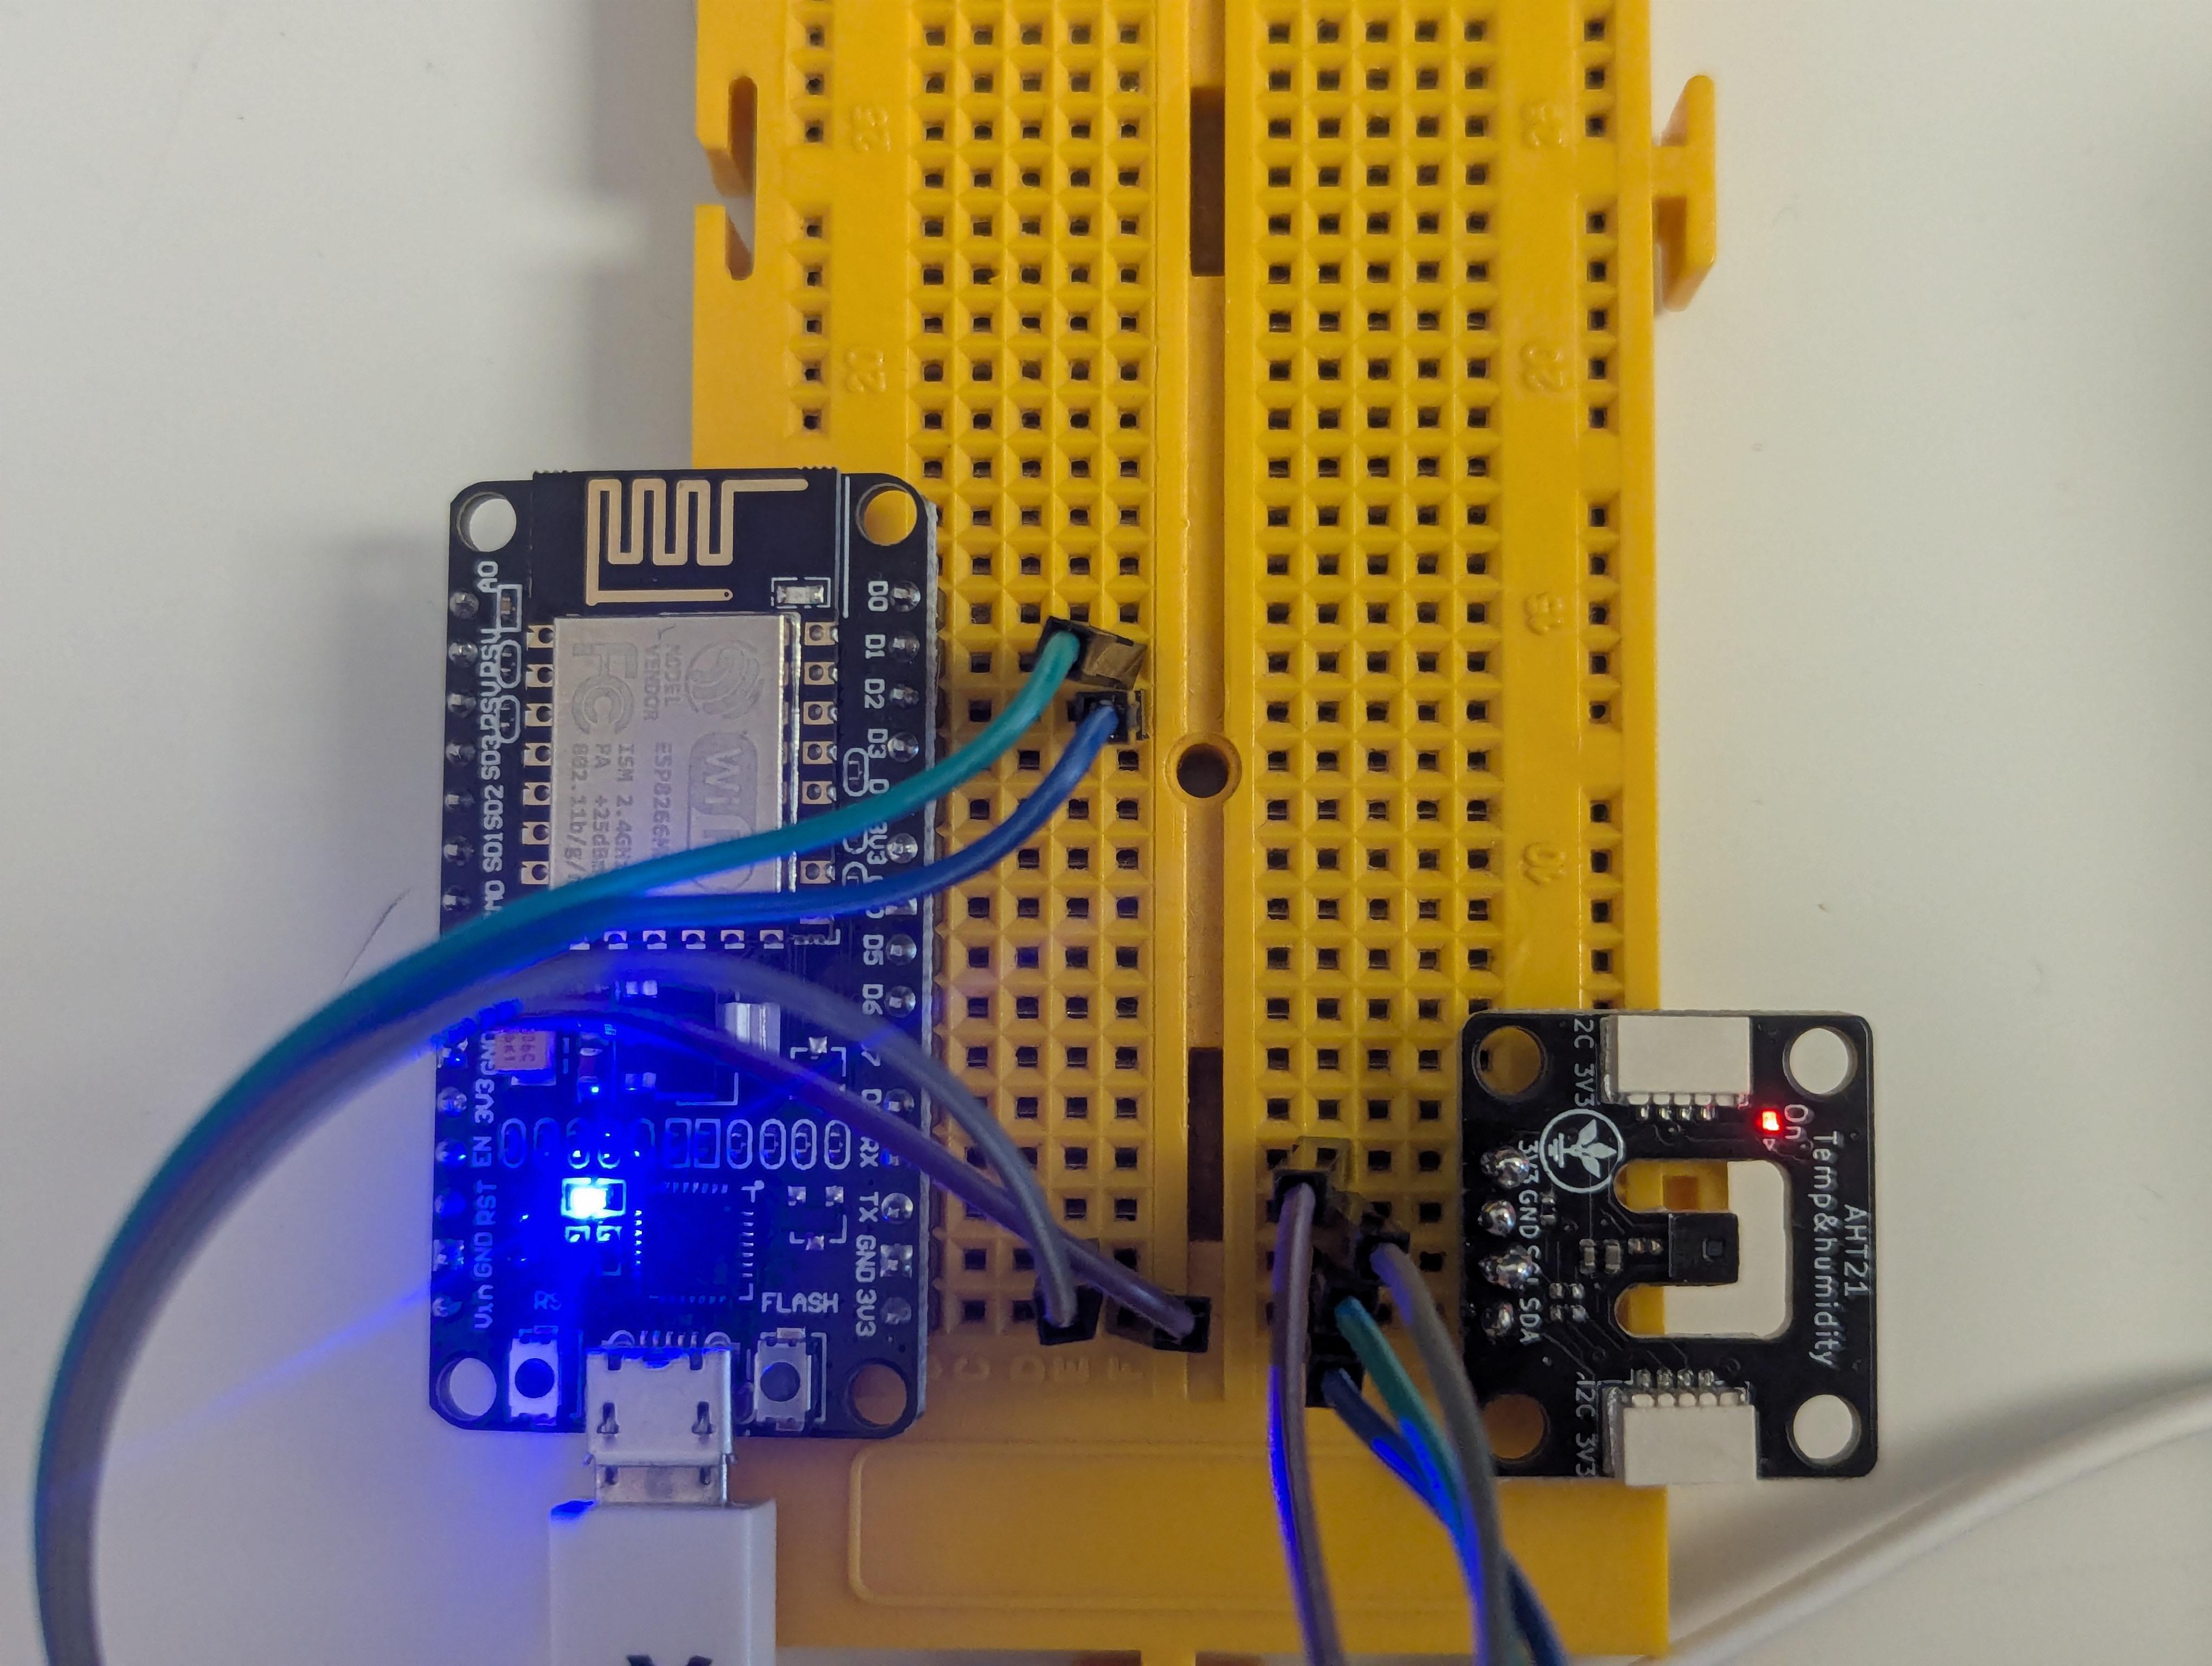
ESPHome ESP8266 Example - Temperature and Humidity
If we want to add a sensor for Temperature and Humidity such as the AHT20, it is available in the ESPHome so we just follow the example for the sensor component page for AHT Sensors
# Example configuration entry
sensor:
  - platform: aht10
    variant: AHT20
    temperature:
      name: "Living Room Temperature"
    humidity:
      name: "Living Room Humidity"
    update_interval: 60s
Including the I2C communication, also as a component
i2c:
  sda: GPIO4
  scl: GPIO5
  scan: true
Hardware connection as follow (According the pinout)
And after uploading the code, we can already see in the logs the communication the communication is successful.

The ESP is getting the information from the sensor and sending out.

And finally, in the home assistant, we can see the Sensor values humidity and temperature, with the names defined in the .yaml.
ESPHome Device Builder
Another way to use the ESPHome is with the Builder, as a web server. After installing the dependencies following the tutorial
pip install tornado esptool
We can start the dashboard,
mkdir config
esphome dashboard config
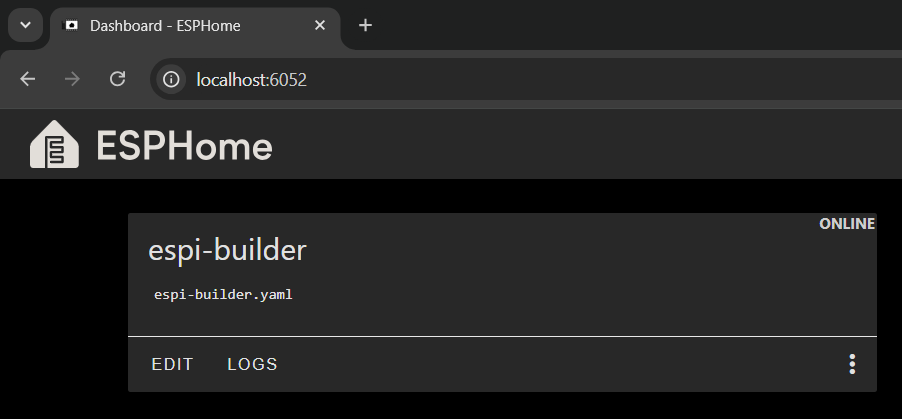
And launching in chrome the dashboard,
localhost:6052
The device can be created, and the configuration could be modified directly on the local web. In other words, we could have exaclty the same as the standard ESPHome but with nicer interface.
Bonus: ESP32 Bluetooth Proxy
For adding Bluetooth devices to our home assistant, we could follow the recommendation from HA “A better approach than a directly connected adapter or card is to use a Bluetooth proxy using an ESP32 since Linux kernel updates have previously broken Bluetooth functionality”
Therefore, this is the ESP32 module to add for forwarding the Bluetooth devices to HA via Wi-Fi: https://esphome.io/components/bluetooth_proxy
Although, there is a “ready-made project” to use directly for the bluetooth proxy, a better (and configurable) option is to do it ourself, at least, with ESPHome. In any case, this is the yaml configuration to add in our devices, coming from the “ready-made” project from before.
Notes:
- The ESPHome Device Builder could be installed directly on the rpi with HA, but it the rpi is not the most recent one I don’t recommend it for resources.
- The integrated bluetooth from rpi could be disconnected to ensure we are using the proxy and not the internal bluetooth.
- With my current / cheap ESP32 I couldn’t manage to connect BLE devices. This may be coming because the ESP32 I use is one of the first generation.
Wrap-up and Ideas for Enhancement
- In this post, we explore 3 ways to program our Espressif devices: Arduino IDE; ESPHome and ESPHome Builder.
- ArduinoIDE is nice, with lot of support, but if custom programming needs to be made, I personally will chose ESP-IDF.
- ESPHome/ESPHome Builder, are a very quick way to integrate a sensor, if you need only that, and the component you want to integrate is on the list.
- HW Setup
- A recent ESP32 is recommended, ESP32-S3-DEVKITC-1
- More powerful RPI (Than the rpi3) is recommended, rpi5
- For the next project,
- Use ESP-IDF (Espressif IoT Development Framework) for development.
- Use Bluetooth Low Energy (BLE) in home assistant