Radio communication 433MHz with ATtiny85
Introduction
The goal of this small project is to test the radio modules at 433MHz and the ATTiny85, also know as the mini arduino, and avoiding as possible the ArduinoIDE in favor of the PlatformIO (Plugin for atom or Visual Studio Code).
Material
- 433MHz radio transmitter and receiver
- ATtiny85 microcontroller
- 2 x Pushbuton
- Anyway for power supply, e.g.: Connector to micro usb or L7805 Voltage regulator 5V
- 1 x 0.33uF and 1 x 0.1uF capacitors if using voltage regulator L7805.
- 2 x 1k resistor
- 1 x 10uF capacitor if using Arduino for programming the ATtiny.
Transmitter
First, the ATtiny microcontroller needs a new bootloader and a program.
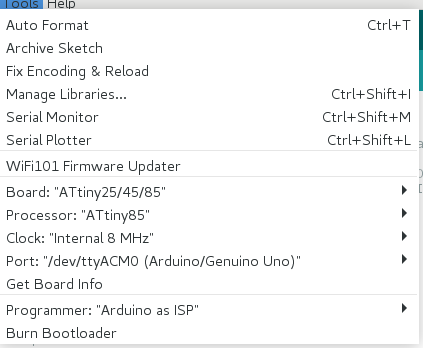
To load the bootloader, we could use the ArduinoIDE with this tutorial and the configuration: ATtiny85, 8MHz clock and using as programmer “Arduino as ISP”.
Make sure the pinout is correct in the datasheet
Then, we could use PlatformIO for loading the new software, e.g.: the blink program, following this tutorial from platformio to use Arduino as ISP.
An example of blink project configured for this attiny in github
After that, we could program the attiny with this program which writes a square pulse of 2ms if no button is pressed, 1.5ms if button right is pressed and 1ms if button left is pressed. This will be our radio protocol for this project.
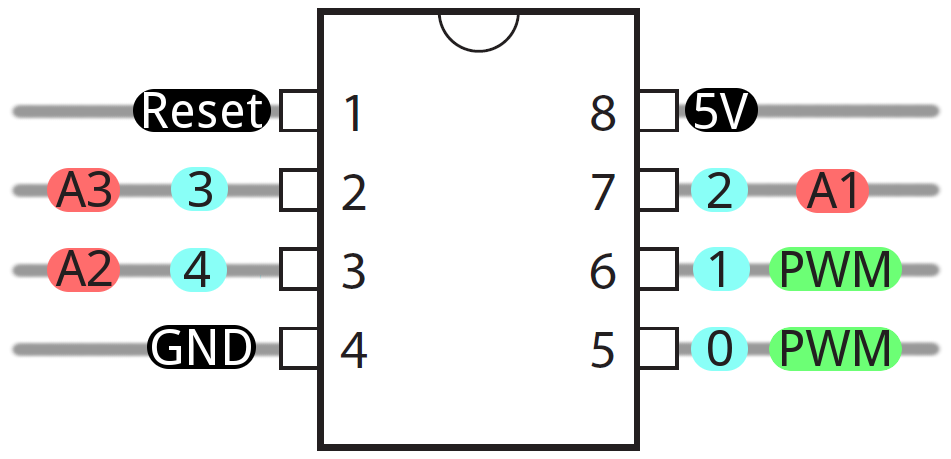
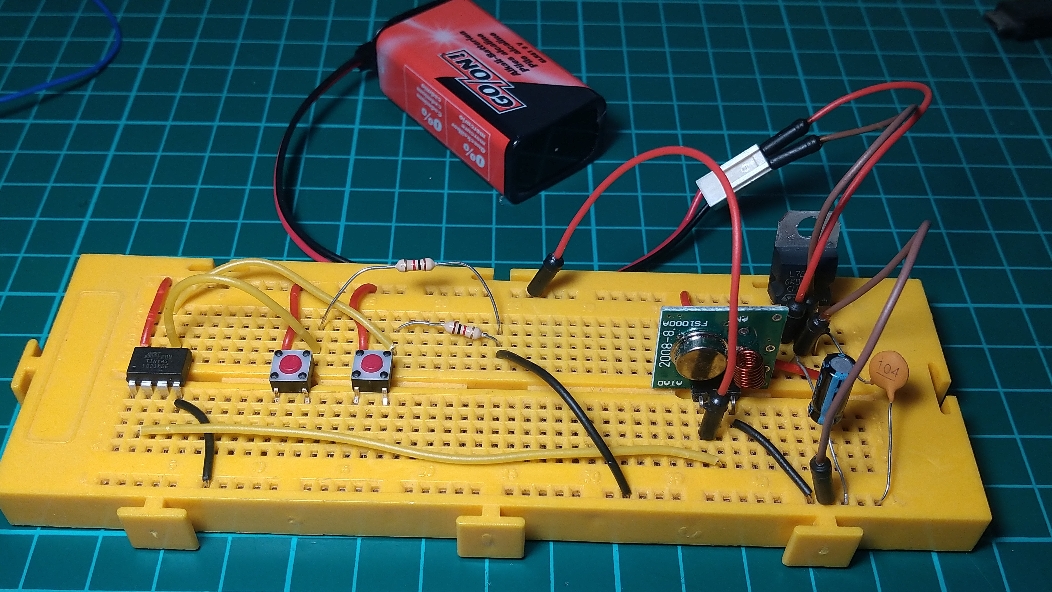
Connect the 5V and the ground, then the left push button to the input 1 (pin6) and the right button to the input 2 (pin7). In the output 3 (pin2) from the microcontroller, will be the signal for the transmitter.
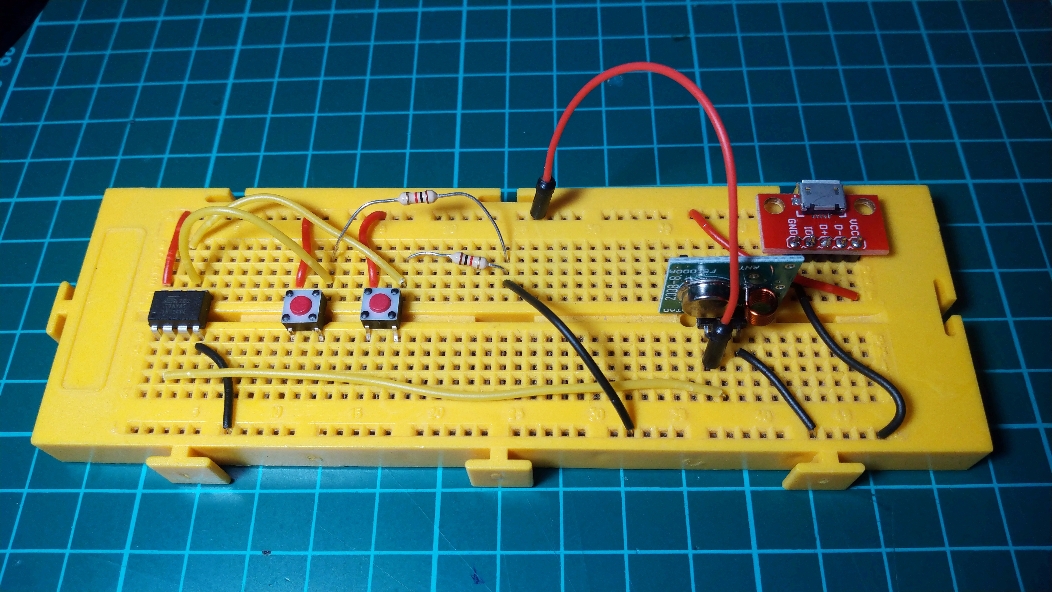
Connect the transmitter with this signal from the microcontroller, 5V and ground.
Then, simply connect VCC and ground to the micro usb interface, and then to a phone charger for example to the mains.
Receiver
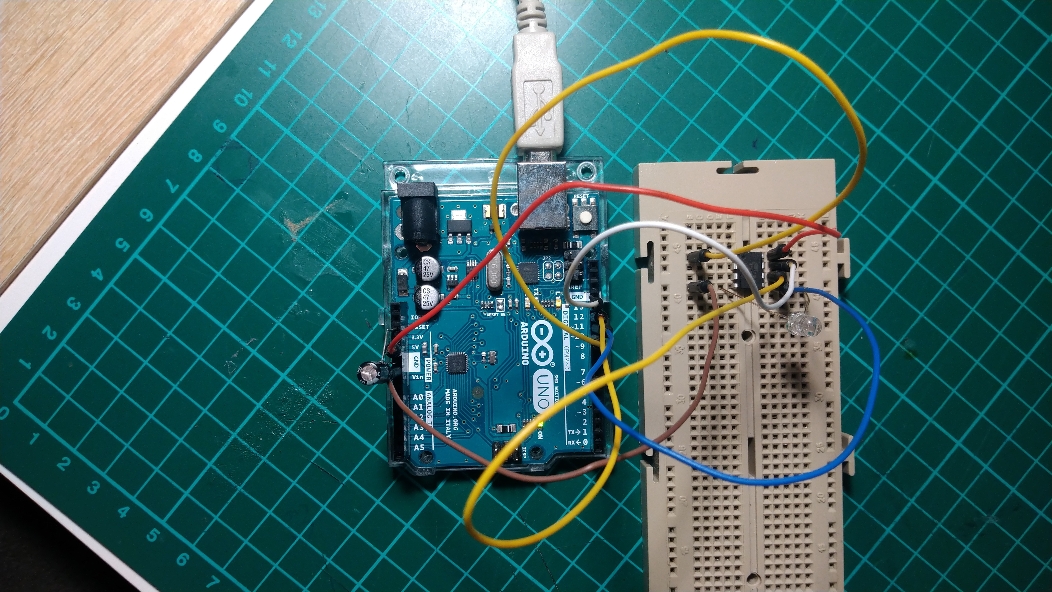
The receiver is quite simple; it’s only the radio module receiver connected to VCC, gnd and to the analog3 from the Arduino Uno.
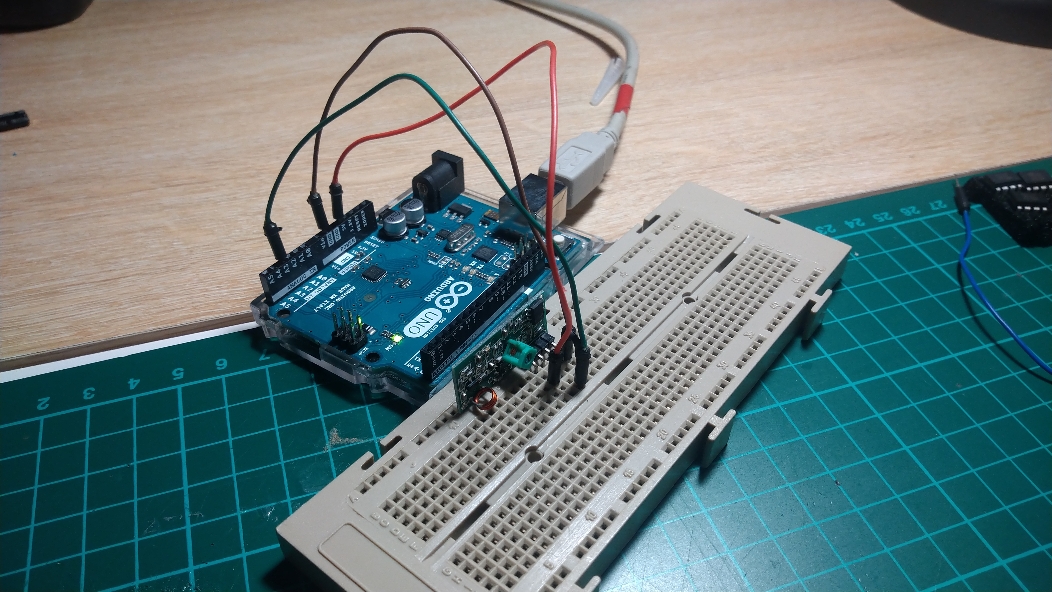
Then, the Arduino is connected to the computer via USB, for powering the Arduino side and for the serial communication.
The software used is in github. If using ArduinoIDE for programming, make sure you change the programmer from “Arduino as ISP” with “AVRISP mkii”
The Arduino will count the milliseconds of the square length: If the length is around 1ms means the button left was pressed. If it is around 1.5ms, the right button. Otherwise, do nothing. The result will be printed in the serial port.
Powering
To make the project portable (and due the radio communication will be normally portable), we could power the project with a battery 9V and using a voltage regulator to convert to 5V.
We will need:
A good tutorial to how to use this voltage regulator is this one
A better one could be the datasheet of the component.
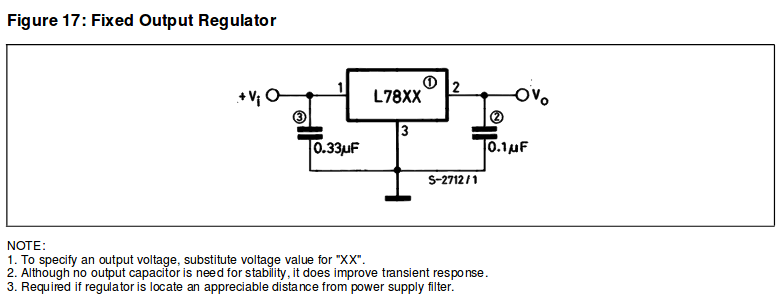
Make sure in the datasheet the pinout is correct and the ouptut is 5V. Otherwise, you will burn your regulator and/or your micro.